 how-to
Can You Repair a Leaky HVAC Condensate Line Yourself?
Last Updated: November 9, 2026
Quick Summary
Often, yes. A condensate line is the small PVC pipe that carries water away from your air conditioner or furnace, and many clogs and loose joints can be fixed with basic tools and patience. Start by reading where the water appears, then match the repair to the failure. Call a licensed technician if the line runs inside a wall or ceiling.
- Shut off the system at the thermostat and breaker before opening anything.
- Water in the drain pan with no drips along the pipe usually means a clog.
- Clear clogs by vacuuming the access tee, then flushing with warm water.
- Replace the whole run if the pipe is brittle or the crack is longer than about an inch.
- Call a technician if the damaged section is inside a wall, ceiling, or chase.
Table of Contents
- Signs Your Condensate Line Is Leaking or Clogged
- Diagnosing a Clog Versus a Cracked, Disconnected, or Sloped Line
- How to Clean AC Drain Line From Inside House Access Points
- Repairing a Cracked or Disconnected PVC Condensate Line Yourself
- Why Your Air Conditioner Drain Line Outside the House Is Dripping
- Ongoing AC Drain Line Maintenance and Preventing Repeat Clogs
- Scheduling a Licensed Technician for Your Next Condensate Line Repair
- Frequently Asked Questions
Can you repair a leaky HVAC condensate line yourself? Often, yes. A condensate line is the small PVC pipe that carries water away from your air conditioner or furnace, and many clogs and loose joints can be fixed with basic tools and a little patience. At M Property Services, we know which fixes homeowners can handle and which call for a licensed technician.
Signs Your Condensate Line Is Leaking or Clogged
The most common sign is water where it should not be. Check around your indoor air handler, the furnace, and the base of the air conditioner for puddles or damp carpet.
Watch for these warning signs:
- Water dripping near the indoor unit or ceiling below it
- Water stains on drywall, a ceiling, or the floor near the air handler
- A musty smell or visible mold around the unit
A slow drip often means a partial clog. If you spot water or a clogged drain, you can check whether a local emergency HVAC repair service handles this kind of problem.
Diagnosing a Clog Versus a Cracked, Disconnected, or Sloped Line
Most condensate problems fall into one of four buckets: a clog, a cracked or split pipe, a disconnected joint, or a line that no longer slopes toward the outlet. Each has a different fix, and guessing wrong wastes time or makes the leak worse. Use the flow below to sort your situation before you touch a tool.
Step 1: Shut down and isolate the system
Turn the system off at the thermostat, then at the breaker that feeds the air handler. This stops condensate production and removes power from the float switch and any nearby electrical components. Put a shallow pan or towel under the access tee and the drain pan before you open anything.
Step 2: Read the water pattern
The location of the water tells you the most.
- Water in the drain pan, no drips along the pipe: almost always a clog downstream of the pan. The pan fills because the line cannot carry water away.
- Water dripping from a fitting, coupling, or union: a loose joint or failed glue joint. The line is passing water but leaking at the connection.
- Water weeping from the side of the pipe, especially a hairline crack: a cracked or split section, often from freeze damage, vibration, or a poorly supported run.
Step 3: Confirm the slope
A condensate line relies on gravity. It must pitch slightly downward from the pan to the outlet, with no flat spots, sags, or uphill sections. Run a level along the pipe or sight down its length. A line that is clear but flat or uphill will still back up, and cleaning it will not fix the problem. Look for sagging between hangers, which is a common cause of recurring leaks.
Step 4: Decide which fix applies
- Clog: standing water in the pan, slow or no flow at the outlet, no visible pipe damage. Go to the cleaning steps.
- Cracked or split pipe: visible crack, weeping along the pipe wall. Go to the PVC repair steps, and replace rather than patch if the crack is longer than about an inch or the pipe is brittle.
- Disconnected joint: separated ends or a fitting that moves. Re-glue or replace the fitting, then re-secure the run.
Watch out: if you cannot see the full run because part of it is inside a wall, ceiling, or chase, stop diagnosing and call a licensed technician. To tell whether your problem is a routine service call or an urgent repair, see HVAC service vs emergency repair. If you would rather have a pro track it down, our Handyman team can help with the diagnosis and repair of accessible sections.
How to Clean AC Drain Line From Inside House Access Points
Most indoor condensate lines have a T-shaped access point, called an access tee, with a removable cap. This gives you a way to clear the line without cutting into it.
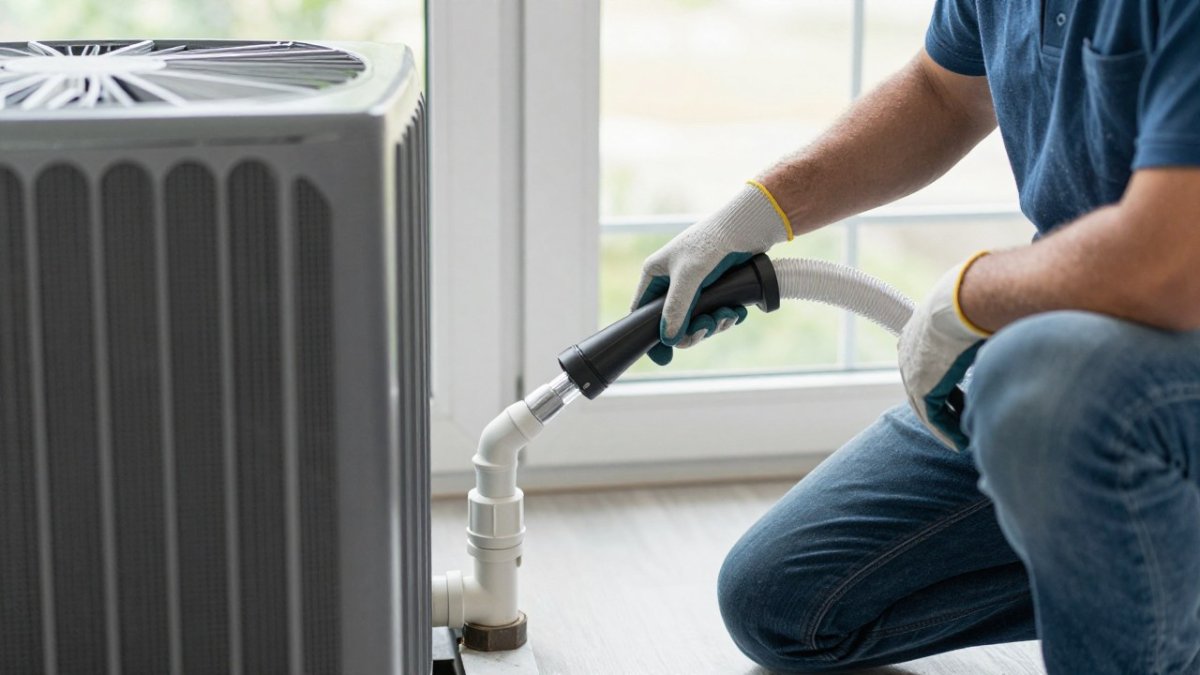
Using a Wet/Dry Vacuum on the Access Tee
A wet/dry vacuum is the most common DIY tool for clearing a clog.
- Shut off power to the system first.
- Remove the access cap slowly, as some water may spill out.
- Seal the vacuum hose over the opening with a rag.
Flushing With Warm Water and Safe Cleaning Options
After vacuuming, flush the line to remove remaining buildup.
- Pour about a cup of warm water into the access tee.
- Check that the water drains freely at the outside outlet.
- If the line is algae-heavy, a cup of distilled white vinegar can help. Let it sit for 30 minutes, then flush with water.
Watch out: never pour chemicals into the line while the system is running. Power off first, and wear gloves and eye protection.
Repairing a Cracked or Disconnected PVC Condensate Line Yourself
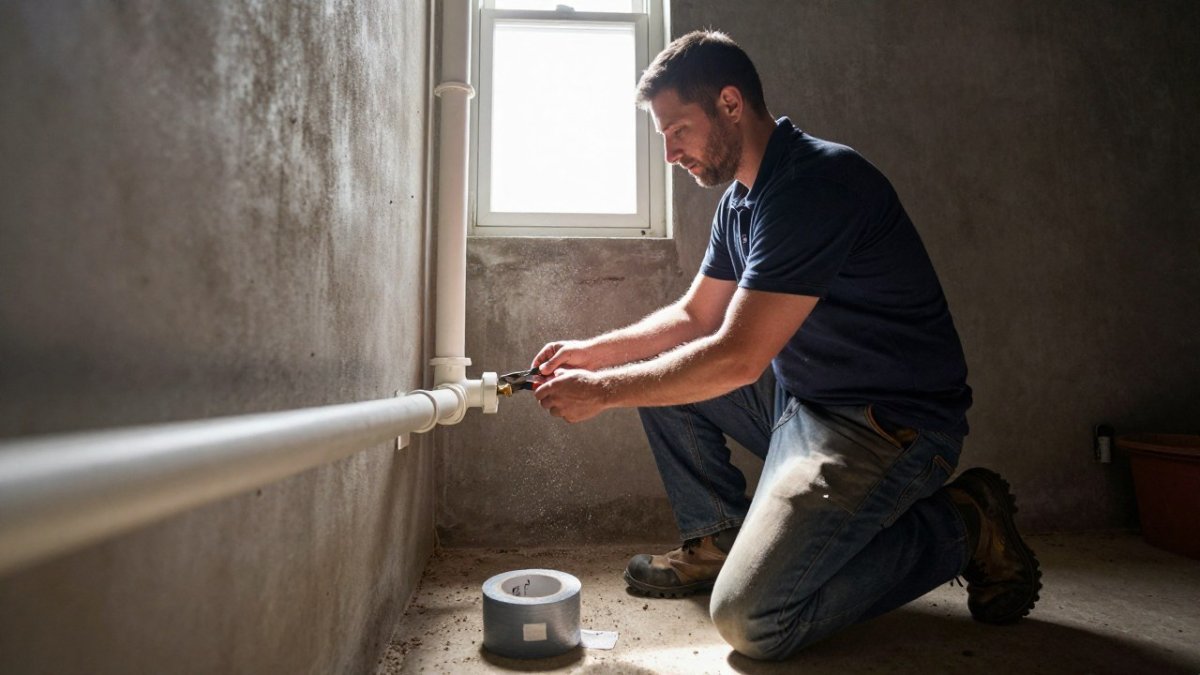
PVC condensate line repairs are within reach for most homeowners, but the right method depends on what failed. A loose joint, a short crack, and a failed fitting each call for a different approach, and patching the wrong one is how repeat leaks start.
Gather the right materials
Use PVC primer and PVC cement rated for the pipe diameter you have, a PVC cutter or fine-tooth saw, emery cloth or sandpaper, and replacement fittings that match the existing size. Most residential condensate lines are 3/4-inch PVC, but confirm by measuring the outside diameter before you buy fittings. Have a shallow pan, rags, and nitrile gloves on hand.
Match the repair to the failure
- Loose or weeping joint: cut out the fitting, clean both pipe ends, and glue in a new coupling or fitting. Do not try to re-glue over old cement; the joint will not seal.
- Small crack (under about an inch): cut out the cracked section and splice in a new piece with two couplings. A wrap or patch is a temporary fix at best and often fails under constant moisture.
- Long crack, brittle pipe, or crushed section: replace the entire damaged run rather than patching. Old PVC gets brittle, and a patch on brittle pipe usually cracks again nearby.
Step-by-step repair
- Turn off the system at the thermostat and breaker, and drain standing water from the pan and line.
- Mark the section to remove, leaving enough straight pipe on each side to seat a coupling.
- Cut with a PVC cutter or fine-tooth saw, keeping the cut square. Debris and shavings must not fall into the line.
- Dry-fit the new piece and fittings, and confirm the length and slope before gluing.
- Clean each joint surface with primer, then apply a thin, even coat of cement to both the pipe and the fitting socket.
- Push the joint together with a quarter-turn and hold for about 10 to 15 seconds so it seats.
- Wipe excess cement, restore the downward slope, and secure the line with hangers or clips so it cannot sag.
- Let the cement cure per the manufacturer's instructions before running the system.
Watch out: PVC cement and primer give off strong fumes and are flammable. Work in a ventilated area, keep them away from the pilot light or any ignition source, and wear gloves and eye protection. Never glue a joint while the line is wet or dirty; the joint will fail.
Verify the repair before you close up
After the cement cures, pour about a cup of water into the access tee and watch the full run. Water should move steadily to the outlet with no weeping at the new joints and no pooling in the pan. Run the system for a cooling cycle and check the joints again after 24 hours, since some slow leaks only show up once the line is under continuous flow.
When to stop and call a professional
Call a licensed technician if the damaged section is inside a wall, ceiling, or chase; if the line is tied into a drain or sump you do not recognize; if the air handler or pan itself is cracked; or if the same joint keeps failing after a proper repair. You can book a licensed technician through our HVAC and furnace repair services.
The right repair depends on what failed, so match the fix to the problem before you cut any pipe.
| Failure | Recommended fix | Key note |
|---|---|---|
| Loose or weeping joint | Cut out fitting, glue in new coupling | Do not re-glue over old cement |
| Small crack (under about 1 inch) | Cut out section, splice with two couplings | Patches often fail under constant moisture |
| Long crack or brittle pipe | Replace the entire damaged run | Patching brittle PVC usually cracks nearby |
| Disconnected line | Re-glue joint or replace fitting, then re-secure | Re-secure the run so it cannot pull apart |
| Pipe size | Measure outside diameter before buying fittings | Most residential lines are 3/4-inch PVC |
| Joint hold time | Hold push-fit for about 10 to 15 seconds | Let cement cure per manufacturer instructions |
Why Your Air Conditioner Drain Line Outside the House Is Dripping
Some dripping outside is normal on a hot day, since the air conditioner pulls moisture from the air. Water from the outdoor termination point should drip, not pour.
Call for help if:
- The water flow is constant and heavy even when the AC is off
- Water pools at the foundation or runs toward the house
- The termination point is blocked by insects, dirt, or debris, and clearing it does not fix the flow
A line that drains too close to the foundation can cause water problems over time. Make sure the outlet points away from the house.
Ongoing AC Drain Line Maintenance and Preventing Repeat Clogs
Most clogs come back because the line is never cleaned. A simple routine helps prevent repeat problems:
- Flush the line with warm water every few months during cooling season
- Vacuum the access tee once a year
- Clean or replace the air filter regularly, since dust feeds the sludge that clogs lines
Regular upkeep is often cheaper than repeated emergency calls, and it catches small problems before they cause water damage. If you are weighing the cost, read whether ongoing furnace and system maintenance is worth paying for. Our guide to how regular HVAC maintenance keeps condensate lines from clogging again explains the routine in more detail.
Scheduling a Licensed Technician for Your Next Condensate Line Repair
Some condensate problems are better left to a professional. Call a licensed technician if the line is inside a wall, the pan is rusted through, the air handler is leaking, or the clog returns within days.
If you decide to hire help, look for a licensed, insured company with local experience. Ask what the repair includes, when they can arrive, and whether they will check the slope and drainage after the fix.
Frequently Asked Questions
Can you fix a leaking condensate drain line yourself?
In many cases, yes. A homeowner can clear a clog with a wet/dry vacuum, re-seat a loose fitting, or cement a cracked PVC section, provided the air conditioner is switched off first and the line is accessible. Work that involves the refrigerant, the evaporator coil, or electrical components should be left to a licensed HVAC technician. If the line is cracked in a hard-to-reach spot or the repair repeats within a few weeks, a professional inspection is the safer next step.
How do you clean an AC drain line from inside the house?
Shut off the system at the thermostat and the disconnect, then locate the access tee near the indoor air handler. Remove the cap, attach a wet/dry vacuum to the opening, and run it for a minute or two to pull out sludge and algae. Flush the line with a small amount of warm water afterward and check that water flows freely to the outside termination. Avoid pouring undiluted bleach or harsh chemicals into the line, as these can damage components and create hazards.
Should an AC condensate line be dripping outside?
Yes, some dripping at the outdoor termination during cooling operation is normal, because the line carries condensation removed from indoor air. The water should drip steadily and then stop when the system cycles off. If there is no water at all during operation, the line may be blocked, or the system may have a different problem. If water pools near the foundation or the drip is continuous when the system is off, the line may be sloped incorrectly or damaged, and a technician should inspect it.
When should you call an HVAC technician for a condensate line leak?
Call a licensed technician if water appears around the indoor air handler or drain pan, if the drain pan is rusted or damaged, if the line cannot be cleared after cleaning, or if the leak recurs quickly. Professionals can test the system, check slope and routing, and confirm that the repair holds. Pricing varies with the repair and your system, so request a quote from M Property Services for current rates for your specific situation.